Optimizing Performance in Next.js: Techniques, Tips & Best Practices
19 April 2025
Why Performance Matters
Speed isn’t just a “nice to have”—it directly impacts user engagement, SEO rankings, and conversion rates. A delay of even 100 ms can cost you real users:
- SEO & Core Web Vitals: Google uses Largest Contentful Paint (LCP), First Input Delay (FID), and Cumulative Layout Shift (CLS) as ranking signals.
- User Engagement: Pages that load in under 2 s see ~50% lower bounce rates.
- Accessibility & Retention: Fast, predictable experiences keep users coming back.
Next.js equips you with powerful defaults—Server‑Side Rendering (SSR), Static Generation (SSG), and built‑in Image Optimization—but how you apply them makes the difference between a ho-hum site and a blazing–fast experience.
1. Static Generation & Incremental Static Regeneration
Static Generation (SSG)
Generating HTML at build time results in ultra‑fast responses. Use getStaticProps for pages whose data changes infrequently:
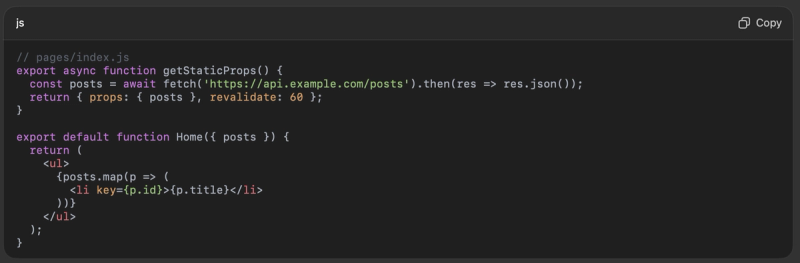
- revalidate: 60 enables Incremental Static Regeneration, updating at most once per minute without rebuilding the entire site.
Server‑Side Rendering (SSR)
For highly dynamic pages (e.g., dashboards, personalized content), fall back to getServerSideProps. It runs on every request—use sparingly:

2. Image Optimization with <Image>
Next.js’s <Image> component automatically:
- Resizes to the viewport
- Serves modern formats (WebP/AVIF)
- Lazy‑loads offscreen images
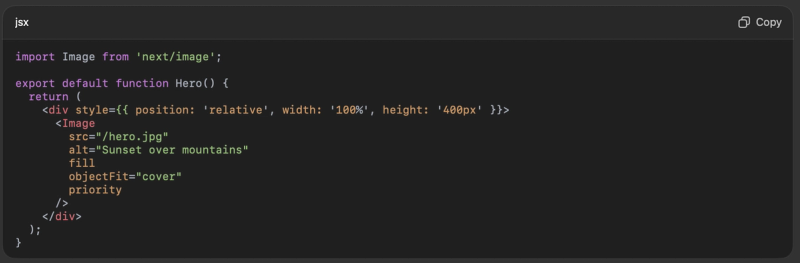
Tip: Use priority for above‑the‑fold images to eliminate LCP delays.
3. Code Splitting & Dynamic Imports
By default, Next.js splits each page’s JavaScript bundle. To further optimize:
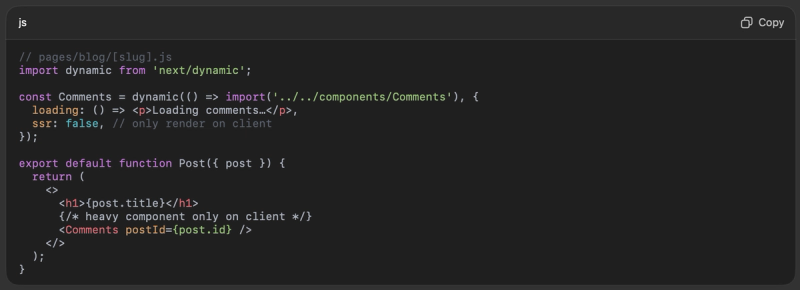
- ssr: false moves the Comments bundle out of your initial SSR payload.
- Use sparingly for very large, non‑critical components.
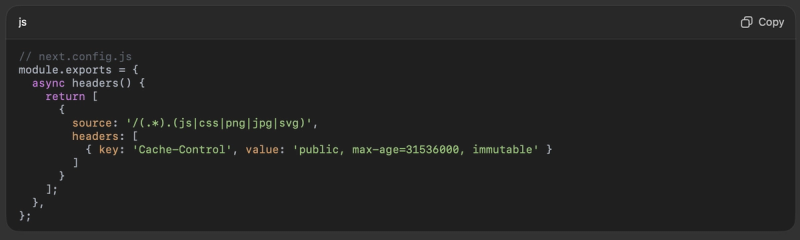
4. Caching & CDN Strategies
HTTP Cache Headers
Leverage Vercel’s built‑in CDN by customizing cache headers in next.config.js or via API routes:
Stale‑While‑Revalidate
For API routes, you can set SWR headers:

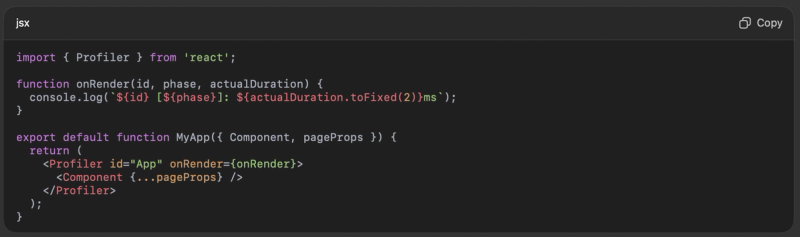
5. Profiling & Real‑User Metrics
React Profiler
Wrap your app to capture render timings:
Vercel Analytics
- Install:

2. Add to _app.js

3. Track real Web Vitals in your Vercel dashboard.
6. Lighthouse Audits & Core Web Vitals
Run npx next lint --fix and npx next build && next start locally, then:

Focus on:
- LCP: Optimize images & remove heavy render-blocking scripts.
- FID: Minimize main‑thread work and use dynamic imports.
- CLS: Always specify width & height on images, avoid layout shifts.
Figure 2. High Lighthouse scores yield better SEO & UX.
Conclusion
By combining Next.js’s built‑in optimizations with these best practices, you can achieve:
- Sub‑2 s page loads for 90 %+ of your users
- Excellent Lighthouse scores (90+)
- Strong Core Web Vitals, boosting SEO and engagement
🎯 Next steps:
- Audit your site in production with Lighthouse & Vercel Analytics
- Gradually apply SSG / ISR to key pages
- Continuously monitor your Real User Metrics
With these techniques in hand, you’ll turn your Next.js site into a performance powerhouse—delighting both users and search engines!
Enjoyed this article?
⭐️ Star CodeWorksLab on GitHub & subscribe for more in‑depth Next.js tutorials!